

5 DIY Simple Christmas Decorations & Gifts
Do you guys want some adorable and useful gift and decoration ideas that won’t break the bank? Handmade items come from the heart and are created with intention and thought. This year I am saving literally hundreds of dollars but still able to gift people quality items for a fraction of the cost. Plus, it’s so fun to be creative! Here are five DIY ideas for this holiday season. Some of which you might be able to make with things that are already in your home!

What you’ll need: -oranges -lemons -limes -cinnamon sticks -twine - Pine twigs *You can also use blood oranges, cara cara oranges or grapefruit! Really whatever you have on hand*
*Make sure you give yourself enough time! Oven time is between 4-6 hours depending on how much fruit you’re dehydrating*
I personally do not own a dehydrator, and if you’re in the same boat then have no fear! You can just use your oven. Start by preheating it to 170 degrees, if your oven doesn’t go that low you can bring it down to 200 degrees and it’ll work just fine! Just reduce your oven time if that’s the case. I thinly sliced all of my fruit and laid them out onto a baking sheet lined with parchment paper. Tip: Definitely use parchment paper if you can, otherwise it’ll stick! Make sure your fruit is spaced out from one another so they don’t stick to each other. After you’ve prepared all the baking sheets now you can stick it in the oven. Set the timer for two hours and then flip all of your fruit at this halfway mark. By now your house will be smelling lovely! Set your timer for another two hours and then check on the fruit, you want your fruit to be FULLY dehydrated otherwise they won’t last as long and will develop mold. For me it took closer to six hours to have all my fruit dried. After this, they’re ready! Grab some twine, some cinnamon sticks and tie or thread your twine through all of your dried fruit until you have a beautiful piece of garland!

What you’ll need for beard oil: -jojoba oil -avocado oil -almond oil -apricot oil -texas cedarwood essential oil -orange essential oil -tea tree oil -oil dropper bottle -small funnel *you can also use castor oil, argan oil, hemp, coconut oil, olive oil, etc.*
What you’ll need for hair growth oil: -dried organic neem leaves -almond oil -oil dropper bottle -small funnel
For the Beard Oil: To make one oil dropper bottle you’ll take one ounce of jojoba oil, ¼ ounce of almond oil, ¼ ounce of apricot oil, ½ ounce of avocado oil, 18 drops of Texas cedarwood essential oil, 7 drops orange essential oil and 7 drops of tea tree essential oil. Mix well and funnel it into the oil dropper bottle. Voila! Apply as needed onto the beard.
For the Hair Growth Oil: Take a handful of dried neem leaves and boil it with 100 ml of almond oil. Place the oil in a mason jar and allow it to soak for one week. During this time the neem leaves will be infused into the oil, turning the color green. After a week, filter the oil through cheesecloth and funnel it into an oil dropper bottle. To use, place several drops of oil onto your hands and distribute through the hair from the roots to your ends. Let sit for 20 minutes up to an hour and then shower as usual. Another method is to add one-two teaspoons of neem oil to your shampoo or conditioner while showering. Let sit for 3-5 minutes and then rinse.
Neem Leaf Fact: Neem leaves are known for its anti-inflammatory, antibacterial and antioxidant properties. It helps soothe scalp inflammation, treat dandruff, smoothe frizz, prevent hair loss and promote healthier, thicker and rich hair growth.

What you’ll need: -pinecones -dishwashing detergent -cinnamon essential oil -sandalwood essential oil -spray bottle -airtight container
*Make sure you give yourself enough time! Bake time is anywhere from one to two hours.
First, grab a basket and scout out some pinecones in your yard or neighborhood. Bring them inside and give them a good wash. I’d soak them in a large bowl or in the sink with warm water and a little dishwater detergent. Submerge them to get rid of any debris. Then rinse them thoroughly. Shake away excess water and pick out any dirt or pine needles. Arrange pine cones on an aluminum foil lined baking tray on a single layer. Bake in the oven at 200 degrees for 45 minutes. After 45 minutes, turn over and continue to bake until they appear fully dry. Check every 2o minutes. For me it took 2 hours. In the meantime, in a spray bottle add about 15 drops of cinnamon essential oil and 15 drops of sandalwood essential oil to ½ cup of warm water. Shake the bottle up. As soon as the pinecones come out of the oven lightly spray with the cinnamon sandalwood water. Turn over and spray the other side. The more you spray, the stronger the scent. For three days keep these pinecones in an enclosed space. Whether it be a ziploc bag or a construction bucket with a lid. This will help the pine cones absorb the scent. After three days, they’re ready to go!
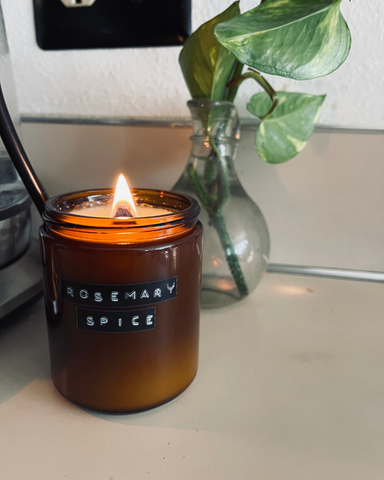
What you’ll need: -soy wax -candle container (I use 8 oz amber colored glass containers) -crackling wick with adhesive -(2) popsicle sticks -stainless steel candle making pitcher -essential oils of your choice -double boiler (although you don’t have to use one - I don’t) -heat gun *optional*
*You can find most of these items at Michaels, Hobby Lobby or online like on Amazon*
First I would prep the container that you are using to hold your candle. To do this, grab your crackling wick and put an adhesive on the bottom and center your wick within your candle container. To make sure it doesn’t shift around I put two popsicle sticks alongside to keep it centered. Next take your stainless steel candle making pitcher and put 1 and ¾ cup of soy wax inside it. However, if you’re using a different sized candle container - you’ll have to adjust the amount of wax accordingly. Next, heat the wax in a double boiler if you have one. If you don’t, you can put together a makeshift one heating the wax in your stainless steel pitcher atop a sauce pan with water in it. Melt wax until it reaches 175 degrees. Remove from heat and now put 10 ml of the essential oils of your choice! Such as sandalwood, eucalyptus, bergamot, ylang ylang, etc. Stir in and now pour the hot wax into your candle container. Let sit and cool for a couple hours. Sometimes the top of the candle will crack or have a rough texture. To fix this you can use a heat gun to smoothe over the surface. Once it has fully cooled then you can cut the wick down and it’s ready to be lit!

What you’ll need: -drill - 1 ½” wood boring drill bit -hand saw or miter saw -tea light candles
First, select the logs you’d like to use! Make sure they look nice because they’ll be on display; saw off any protruding branches and slice off the ends for a nice and clean cut. You don’t want them leaning on one side. Next you can cut the logs at different lengths such as: 3”, 5”, 7: or 9”. If you have them on display together they’ll be at all varying heights. Now grab your drill and drill a hole to a depth of ½” or until the tea light is flush with the surface of the stump. Now you can arrange your log tealight candle holders all over your house or as a centerpiece for your table! And voila! You’re done!
